How to Get Your Google Calendar iCal Link (the Secret Address)
Google Calendar's iCal link is called the secret address, and it lives under Settings → your calendar → Integrate calendar. You can only get it in a browser on a computer; the phone apps don't show it.
Here are the four steps, then what the link is and why it needs looking after.
Get the link
- Open Google Calendar in a browser on a computer.
- Open Settings — the gear in the top right corner, then Settings in the menu.
- In the left sidebar, under Settings for my calendars, choose the calendar you want. (You can also get here by hovering over the calendar in the main sidebar and picking Settings and sharing from its ⋮ menu.)
- Scroll down to Integrate calendar and copy the address under Secret address in iCal format.
That's the whole job. The address looks like this:
https://calendar.google.com/calendar/ical/you%40gmail.com/private-xxxx/basic.ics
The real one has a long random string where private-xxxx is. Everything after
private- is the part that matters.
What the link actually is
It's a live, read-only feed of that one calendar. Anything that can read it sees your events update as you change them, and nothing that reads it can write back. That's why a wall display, a dashboard or another calendar app asks for this rather than for your password: you're handing over a view, not an account.
It's also why the address is long and random. The random part is the login. There's no sign-in step, so whoever holds the URL is treated as you, indefinitely, and Google has no way to tell you who has used it. Treat the address exactly like a password:
- Don't put it in a shared document, a screenshot, a public issue or a group chat.
- If it does get out, open the same Integrate calendar screen and press Reset next to the secret address. Google issues a new one and the old one stops working immediately — which also means anything you had pointed at the old address needs the new one.
One calendar per link
The secret address covers one calendar, not your whole account. If your family's events are spread across a personal calendar, a school calendar and a partner's calendar, you need one address from each. Most tools that read them, DinkyDash included, merge several feeds into a single agenda.
Repeat the four steps for each calendar in the Settings for my calendars list.
If the section isn't there
Two things hide it:
- A work, school or organisation account. An administrator can switch external sharing off for everyone, and when they have, the Secret address in iCal format row simply is not on the page. There's no way round it from your side. A personal Google account is the usual answer — make a family calendar there and invite your work account to the events that matter.
- A calendar somebody else owns. A calendar shared with you has no secret address of yours to hand out. Ask the owner for theirs, or use their public address if the calendar is a public one.
Put it on a screen
A calendar link on its own does nothing until the family can see it — a tablet in the hall, an old TV, or a small screen on the kitchen wall.
Which screen? An old iPad or an Android tablet is the cheapest good panel, a Raspberry Pi the tidiest, and a smart TV or Fire TV will show it on the big screen. There's one device it doesn't work on, and the Echo Show page says why.
DinkyDash is open-source software that does exactly that. We can host it for you ($39 a year after a 14-day free trial), or you can run it yourself for free. Paste the link and it shows today's events on a wall screen, alongside a rotating chore chart, birthday countdowns and a headline written fresh each day. There's no Google sign-in — the link is the whole connection, and it can only read.
To add it:
- Open Settings → Calendars → Add a calendar.
- Give it a name and paste the address into Calendar link (iCal / ICS).
- Press Test calendar link. It says how many events it found and what the next one is, so you know it works before you save.
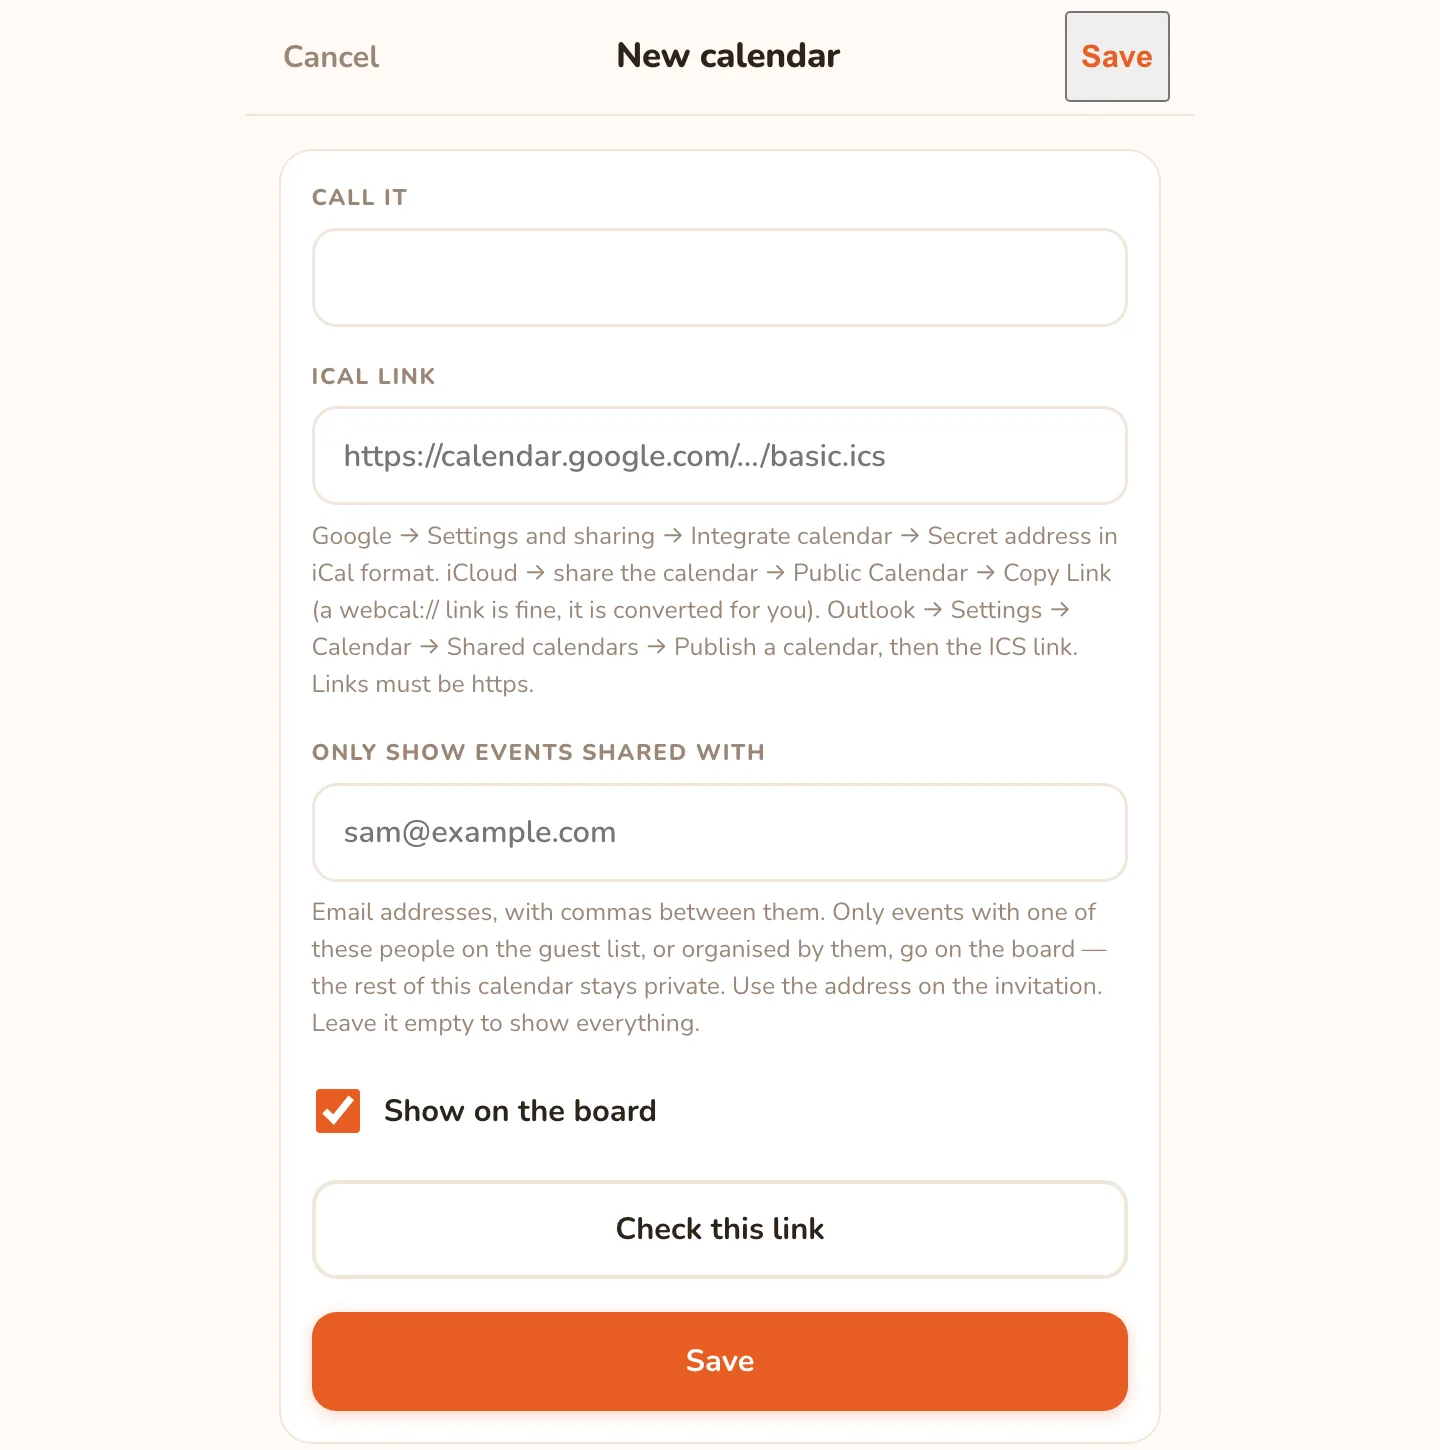
If your own calendar also holds work meetings you would rather not put on the kitchen wall, fill in Only show events shared with and give the other parent's email address. Only the events they are invited to reach the screen. The getting started guide has the detail.
Two things people get wrong
An http:// version of the address. Some older guides suggest editing the URL by hand.
Don't — the address is a password, and plain http puts it on the network in the clear.
DinkyDash refuses http links for that reason. Copy what Google gives you.
Confusing it with the public address. The same Integrate calendar screen also lists a public address and an embed code. Those only work on a calendar you have made public, which means anybody can find it. The secret address is the one that works on a private calendar, and it's the one you want.
Other calendars
- Apple iCloud Calendar — turn on Public Calendar and copy the link
- Outlook and Microsoft 365 — publish the calendar, then take the ICS link
- Cozi — Settings → Shared Cozi Calendars
Any of them, or several at once, merge into one agenda. To skip the setup, start a free 14-day hosted trial and paste the link there. To run it yourself, the full setup guide starts on your own computer.
Last updated 2026-10-09.