How to Publish an Outlook Calendar and Get the ICS Link
Outlook calls this publishing. In Outlook on the web, go to Settings → Calendar → Shared calendars, publish the calendar under Publish a calendar, and copy the ICS link — not the HTML one.
Here are the steps, then the two choices on that screen that decide whether it works.
Get the link
- Open Outlook on the web and switch to the calendar.
- Open Settings (the gear in the top right), then Calendar, then Shared calendars.
- Under Publish a calendar, choose the calendar you want to publish.
- Set the permission to Can view all details.
- Press Publish.
- Two links appear. Copy the ICS one.
The address looks like this:
https://outlook.office365.com/owa/calendar/xxxxxxxx@example.com/xxxxxxxx/calendar.ics
A personal Outlook.com account produces a slightly different host; a Microsoft 365 work account produces the shape above. Either is fine.
The two choices that matter
Permission: "Can view all details". The other options publish only when you're busy, with no titles and no locations. That's useful for scheduling with colleagues and useless on a kitchen wall — a screen that says "Busy, 15:00" tells nobody anything. Pick the full-detail option or the display will look broken when it's working exactly as configured.
ICS, not HTML. Outlook gives you both:
| Link | What it is for |
|---|---|
| HTML | Opens a read-only view of your calendar in a browser, for a human to look at |
| ICS | A machine-readable feed, for another calendar app or a display to subscribe to |
Anything that has to show your events somewhere else needs the ICS link. Paste the HTML one into a dashboard and it will fail to parse, because it's a web page rather than a calendar.
Publishing is a password in a URL
Once published, the ICS link works for whoever holds it. There's no sign-in at the other end — the long random string in the address is what stands in for one. Anyone with the URL reads your calendar at full detail, for as long as it stays published, and Microsoft doesn't tell you who has.
So treat it the way you would treat a password: keep it out of shared documents, screenshots, public issues and group chats. To take it back, return to Shared calendars and stop publishing. The link dies immediately, and republishing gives you a different one — so anything pointed at the old address needs updating.
When "Publish a calendar" isn't there
On a work or school Microsoft 365 account, calendar publishing is an administrator setting, and plenty of organisations leave it off. When it's off, the section is missing or does nothing at all, and there's no way round it from your side.
Two things that do work:
- Use a personal Outlook.com account for the family calendar, and invite your work account to the events that matter.
- Ask the administrator. It's a per-organisation policy in the Exchange admin centre, and in a small business the answer is sometimes just yes.
One calendar per link
Publishing covers one calendar. A household running a personal calendar, a school calendar and a partner's calendar publishes each one and gets three links. Most displays merge several feeds into a single agenda — DinkyDash sorts them into one day in time order rather than showing three separate lists.
Put it on a screen
The reason to publish is usually to get the calendar somewhere everyone can see it without opening a laptop.
Which screen? An old iPad or an Android tablet is the cheapest good panel, a Raspberry Pi the tidiest, and a smart TV or Fire TV will show it on the big screen. There's one device it doesn't work on, and the Echo Show page says why.
DinkyDash is open-source software that does exactly that. We can host it for you ($39 a year after a 14-day free trial), or you can run it yourself for free. Paste the ICS link and today's events appear on a wall screen, beside a chore chart that rotates by itself, countdowns to birthdays and holidays, and a short line written fresh each day. There's no Microsoft sign-in in it — the published link is the whole connection, and it can only read.
To add it:
- Open Settings → Calendars → Add a calendar.
- Give it a name and paste the ICS address into Calendar link (iCal / ICS).
- Press Test calendar link. It says how many events came back and what the next one is, before you save.
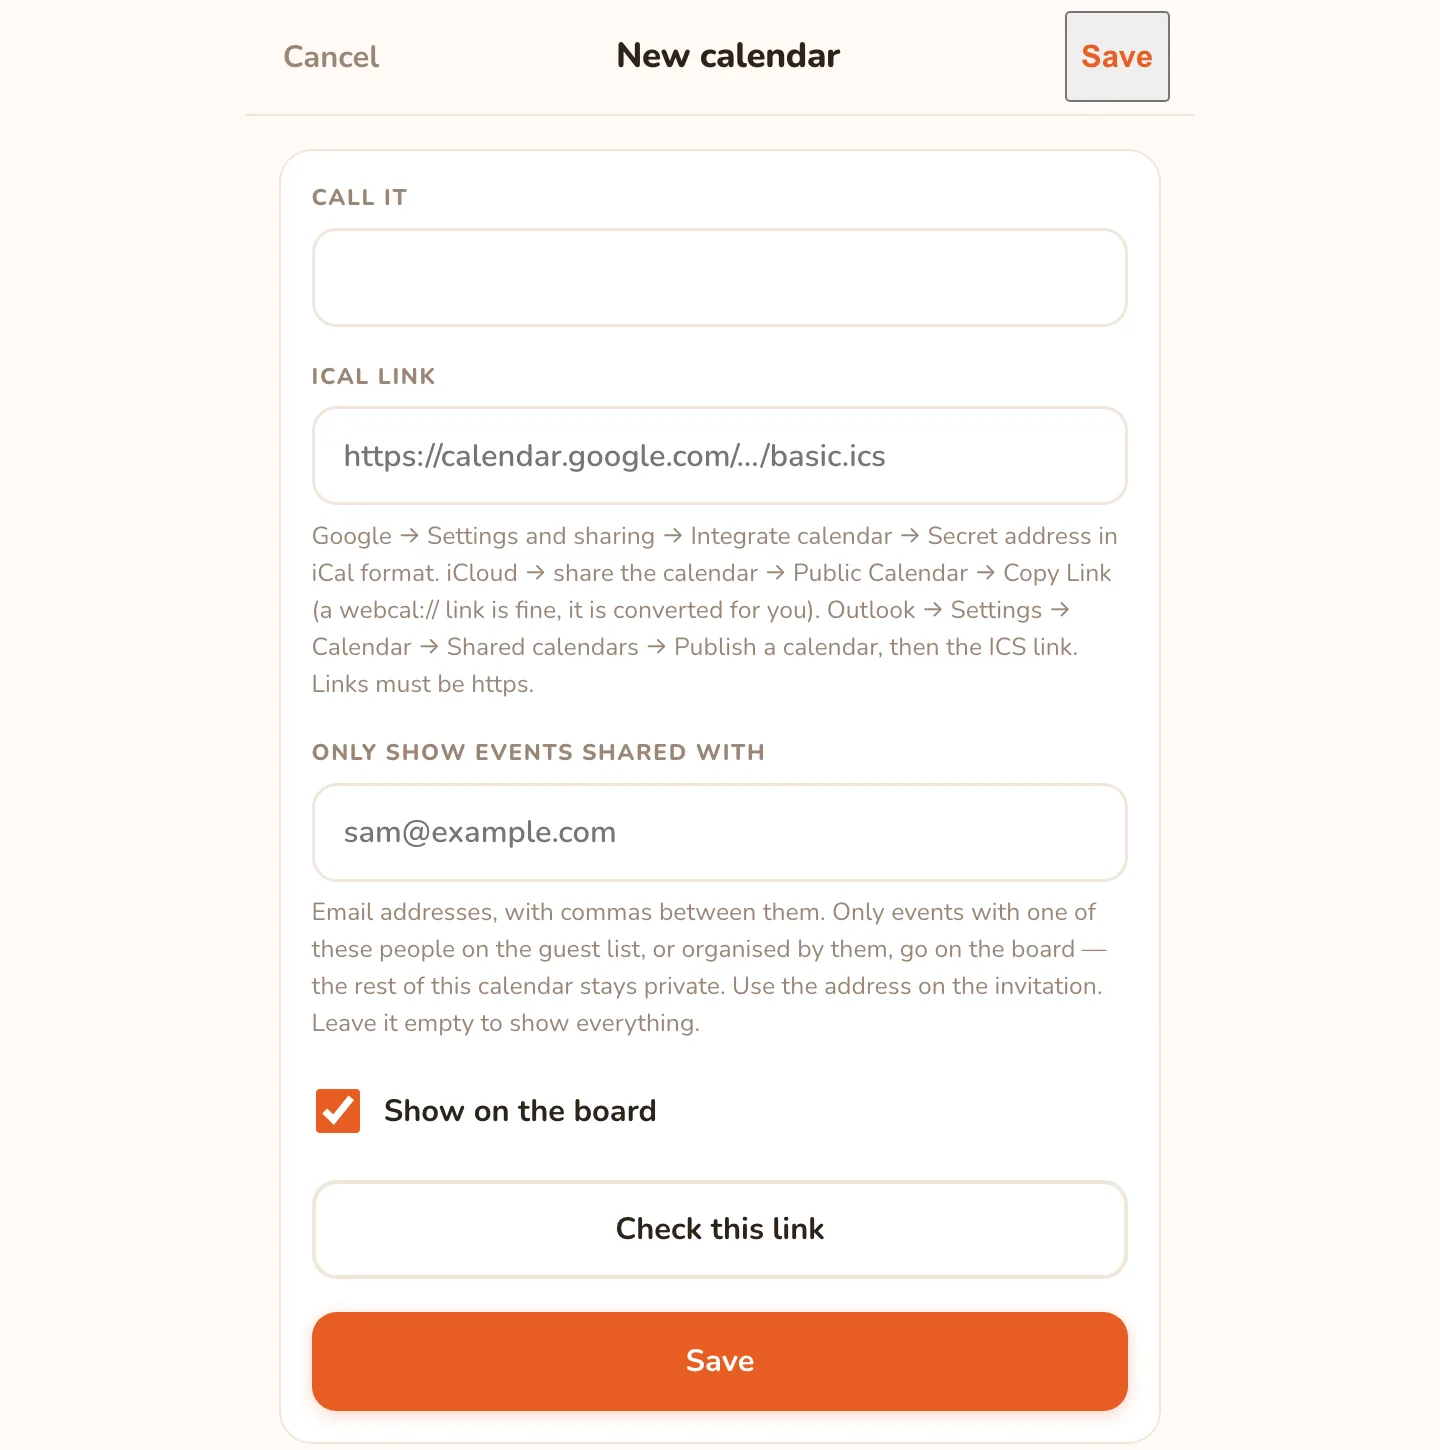
If the calendar also holds work meetings you would rather keep off the kitchen wall, fill in Only show events shared with and give the other parent's email address — only events they are invited to reach the screen. The getting started guide has the detail.
Other calendars
- Google Calendar — Settings → Integrate calendar → Secret address in iCal format
- Apple iCloud Calendar — turn on Public Calendar and copy the link
- Cozi — Settings → Shared Cozi Calendars
They mix freely and end up as one agenda. To skip the setup, start a free 14-day hosted trial and paste the link there. To run it yourself, the full setup guide starts on your own computer.
Last updated 2026-10-09.